There’s something undeniably satisfying about a perfectly crafted mocha—rich chocolate mingling with bold espresso, topped off with creamy frothed milk. It’s a comforting, indulgent drink that feels like a treat every time. But why wait for a trip to your local coffee shop when you can make this café favorite right at home?
Making a mocha might sound fancy, but it’s surprisingly simple, and it doesn’t require a barista’s skill or professional equipment. With just a few basic ingredients you likely already have in your kitchen, you can whip up a mocha that rivals anything you’d buy outside. Whether you’re a coffee enthusiast looking to expand your home brew options or just craving something sweet and warm, this guide will take you through the easy steps to make the perfect mocha.
We’ll cover the essentials—brewing the right espresso, getting that chocolatey goodness just right, and frothing the milk to perfection. Plus, you’ll find tips for customizing your mocha to fit your personal taste, whether you prefer it rich and dark or light and creamy. So grab your coffee beans and chocolate, and let’s dive into the world of homemade mochas!
Ingredients You’ll Need
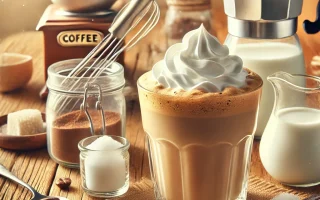
When it comes to making a mocha at home, the magic lies in the simplicity of the ingredients. The best part? You probably already have most of them in your kitchen. At its core, a mocha is the delicious result of three key components: coffee, chocolate, and milk. But each of these can be customized to suit your preferences, making it a drink you can easily personalize.
- Let’s start with the coffee. You’ll need a strong base, which typically means brewing up a shot of espresso. Don’t have an espresso machine? No problem. A good, strong cup of coffee brewed with a French press or moka pot will work just fine. The key is to ensure your coffee is rich and concentrated, giving your mocha that bold flavor to balance the sweetness of the chocolate.
- Next up is the chocolate. This is where the fun begins. You can use chocolate syrup for convenience or go for cocoa powder if you want a more traditional, slightly bitter chocolate flavor. For those who love a richer, creamier mocha, melting high-quality chocolate directly into your coffee can take things to the next level. Don’t be afraid to experiment with dark, milk, or even white chocolate, depending on your mood.
- Finally, there’s the milk. Whole milk is the go-to for a creamy mocha, but if you’re dairy-free or looking for a lighter option, almond milk, oat milk, or coconut milk all froth up beautifully. The trick is to choose a milk that will complement the chocolate and coffee, adding the perfect velvety texture. Whether you’re using a milk frother or heating it on the stovetop, this part is crucial to giving your mocha that café-style finish.
Tools Required
Making a mocha at home doesn’t demand a fancy setup, but having the right tools on hand can make all the difference in achieving that smooth, café-style experience. Whether you’re a coffee novice or an enthusiast, these tools will help you create the perfect mocha with minimal fuss.
- First and foremost, you’ll need something to brew your coffee or espresso. If you have an Espresso machine, you’re already set for success. This is ideal for pulling that rich, concentrated shot of espresso that forms the foundation of a good mocha. But if you don’t have an espresso machine, don’t worry. A French press or Moka pot will also do the trick. Both are excellent for brewing strong coffee that can substitute for espresso, giving your mocha that bold flavor that pairs perfectly with chocolate.
- Next, you’ll want a way to froth your milk. A simple handheld milk frother is an affordable tool that works wonders, giving you a nice, creamy foam with ease. If you don’t have a frother, a whisk or even a mason jar can get the job done in a pinch. Just heat your milk, shake it up in the jar or whisk it vigorously until you get a frothy consistency. The goal is to create that silky layer of foam that will make your mocha feel luxurious.
- You’ll also need a small saucepan or a microwave-safe bowl to heat your milk, especially if you’re not using an espresso machine with a built-in steamer. It’s important to heat the milk gently to avoid scalding, keeping the texture smooth and creamy.
- Finally, don’t forget a mug and a spoon for mixing. While these might seem obvious, they play a key role in blending the chocolate and espresso smoothly. A larger mug will give you room to mix everything without spilling, and a spoon will help ensure that every sip is perfectly balanced.
With these basic tools—coffee maker, frother, saucepan, mug, and spoon—you’re ready to create a mocha that rivals anything you’d get at a café. No complicated equipment needed, just simple tools that transform your kitchen into your personal coffee bar. Let’s move on to the brewing process and bring that mocha to life!
Step 1: Brew the Espresso
The heart of any good mocha lies in the espresso. It’s the rich, bold foundation that gives your drink the depth to balance out the sweetness of the chocolate and the creaminess of the milk. If you’ve ever enjoyed a mocha from a café, chances are it started with a shot of perfectly brewed espresso. And the best part? You can achieve the same result at home with just a few simple tools.
If you have an espresso machine, you’re already off to a strong start. Begin by using freshly ground coffee beans, ideally with a fine grind that suits espresso. Fill your portafilter, tamp it down firmly, and brew a shot of espresso. For a standard mocha, one shot (about an ounce) is usually enough, but if you like your drinks on the stronger side, feel free to pull a double shot. Once brewed, the espresso should have a rich, dark color with a slight layer of crema on top, which adds to the flavor and texture.
But what if you don’t have an espresso machine? No worries! A moka pot is a fantastic alternative and a staple in many coffee lovers’ kitchens. Known for making strong, concentrated coffee, the moka pot can easily mimic the strength of an espresso shot. Simply fill the bottom chamber with water, add finely ground coffee to the filter basket, and heat it on the stove. The result is a bold coffee concentrate that’s perfect for making a mocha.
Another option is using a French press. While it won’t give you the exact intensity of espresso, brewing a strong cup of coffee with a French press can still do the job. Use a higher coffee-to-water ratio (about two tablespoons of coffee per 4 ounces of water) and let it steep for 4-5 minutes before pressing. The outcome will be a robust, flavorful brew that holds up well against chocolate and milk.
Regardless of your brewing method, the key is to create a concentrated, bold coffee base. Once your espresso or coffee is brewed, set it aside—it’s time to move on to the next step: adding that luscious chocolate! Whether you’re going for a single or double shot, the brewed coffee will be the backbone of your homemade mocha, giving it that unmistakable café-quality flavor.
Step 2: Prepare the Chocolate
Now comes the part that really turns your coffee into a mocha—the chocolate. The interplay between rich coffee and smooth, sweet chocolate is what makes a mocha so irresistible. Luckily, preparing the chocolate is easy, and you have a few options depending on your preferences and what you have in your kitchen.
The simplest way to add chocolate to your mocha is by using chocolate syrup. It’s convenient, blends easily into hot coffee, and gives you that classic sweet mocha flavor. You’ll want to use about one to two tablespoons of syrup, depending on how sweet and chocolatey you like your mocha. Simply add it directly to your brewed espresso or coffee and stir until it’s fully dissolved. The syrup gives your drink a smooth, velvety texture and instantly infuses it with rich chocolate flavor.
If you prefer a more intense, slightly bitter chocolate taste, you can opt for cocoa powder. Unsweetened cocoa powder is a great choice for those who enjoy a darker chocolate flavor in their drinks. Mix about one tablespoon of cocoa powder with a little sugar (or sweetener of your choice) to balance out the bitterness. Before adding the cocoa mixture to your espresso, it helps to dissolve the cocoa powder in a small amount of hot water—this will prevent clumps and give you a silky smooth texture. Once dissolved, stir it into your espresso until the chocolate and coffee are well blended.
For those looking to indulge a bit more, melting real chocolate into your mocha is the ultimate treat. You can use chopped dark chocolate, milk chocolate, or even white chocolate, depending on your taste. Heat the chocolate in a small saucepan over low heat or in the microwave in short bursts, stirring frequently to prevent burning. Once melted, pour the rich, velvety chocolate into your espresso and stir until fully combined. This method delivers a more luxurious, creamy mocha with a deep, complex flavor.
No matter which option you choose—syrup, cocoa powder, or melted chocolate—the key is to mix it thoroughly with the espresso to create a smooth base. The chocolate should enhance the coffee without overpowering it, creating that perfect balance of flavors that makes a mocha so special. Now that your chocolate and coffee are blended into a rich, flavorful base, it’s time to move on to the next step—frothing the milk for that final touch!
Step 3: Froth the Milk
The final touch that transforms a mocha from a simple coffee-chocolate mix into a café-style masterpiece is the milk. Frothy, creamy milk adds a layer of texture and richness that elevates your drink, giving it that luxurious feel. But don’t worry—you don’t need a high-end espresso machine to achieve perfectly frothed milk. Whether you’re working with a fancy frother or just a whisk, getting the right consistency is totally doable at home.
First, let’s talk about the type of milk. Whole milk is a popular choice because it froths up beautifully, creating that velvety texture mochas are known for. But if you’re dairy-free or prefer a lighter option, alternatives like almond milk, oat milk, or coconut milk also work well. Just make sure to use a milk that you enjoy drinking on its own, as its flavor will play a big role in your mocha.
To start, heat your milk. You can do this in a small saucepan on the stove or in the microwave. The key is to warm the milk gently—don’t let it boil. Aim for it to be around 150°F (65°C), which is hot enough to froth without scalding. If you don’t have a thermometer, heat the milk until it’s steaming but not bubbling. If it gets too hot, it can affect the flavor and texture, so be mindful of that.
Now comes the fun part—frothing the milk. If you have a milk frother, you’re in for a smooth ride. Simply pour the heated milk into a frothing jug and use your handheld frother to whisk it until it becomes light and frothy. You’re aiming for small, fine bubbles that create a creamy texture rather than large, airy foam.
No frother? No problem. You can use a whisk or even a mason jar to achieve similar results. If using a whisk, pour the milk into a deep bowl and whisk vigorously in a circular motion until you see it start to foam. It may take a little arm work, but it gets the job done! If you’re using a mason jar, pour the milk in, seal it with the lid, and shake it vigorously for 30-60 seconds. This method is surprisingly effective at creating foam, especially for lighter milk varieties.
Once your milk is frothy, pour it gently over your espresso-chocolate mixture, holding back the foam with a spoon and then layering it on top. The rich foam will give your mocha that delightful, indulgent finish, and the creamy texture will blend perfectly with the bold espresso and sweet chocolate. Now you’re ready for the final step—combining all these delicious elements into the perfect mocha. Enjoy!
Step 4: Combine and Stir
Now that you’ve got all your components ready—bold espresso, rich chocolate, and frothy milk—it’s time to bring everything together. This is where the magic happens. The key to a great mocha is achieving that perfect blend of flavors, where each element complements the others without overpowering the whole. It’s the moment your homemade mocha truly comes to life.
Start by taking your espresso-chocolate base, which you’ve already mixed together, and slowly pour the frothed milk over it. You’ll want to pour the milk in gradually, allowing it to gently blend with the espresso and chocolate. Hold back the foam with a spoon while pouring the milk, so the liquid mixes well first. This helps to create a seamless blend of the deep coffee flavors with the sweetness of the chocolate and the creamy richness of the milk.
Once most of the milk has been poured in, give the drink a good stir to ensure everything is well mixed. Use a spoon to swirl the espresso, chocolate, and milk together. This step is important because it helps distribute the chocolate throughout the drink, ensuring each sip is full of flavor. Stirring also helps incorporate the espresso into the milk, creating a smooth, balanced texture. Make sure to scrape the sides of the cup if there’s any chocolate that hasn’t fully dissolved—every bit counts in creating that perfect mocha experience!
Now that everything’s mixed together, it’s time to add the final touch: the foam. Using your spoon, gently scoop the frothy milk foam that you held back earlier and place it on top of your mocha. This adds a delightful layer of texture and gives your mocha that signature café-style finish. The foam acts as a light, airy topper, contrasting with the rich and creamy drink below.
At this point, your homemade mocha is almost ready to enjoy. If you’re feeling a little fancy, now’s the time to add a few optional extras—a drizzle of chocolate syrup, a sprinkle of cocoa powder, or even some whipped cream for an extra indulgent touch. These toppings are totally optional but can add a bit of flair to your drink, making it feel even more special.
And just like that, your mocha is complete! The smooth, velvety milk blends with the rich chocolate and bold espresso, creating a perfectly balanced drink that feels both comforting and indulgent. All that’s left to do now is sit back, take a sip, and savor the delicious flavors of your homemade creation. Enjoy!
Optional Add-Ins and Variations
One of the best things about making a mocha at home is the freedom to customize it just the way you like. While the classic mocha recipe is a beautiful balance of coffee, chocolate, and milk, there’s always room for a little experimentation to take things to the next level. Whether you’re in the mood for something a bit more indulgent, or you want to tailor your mocha to match a specific craving, there are plenty of optional add-ins and variations that can elevate your homemade drink.
First up, let’s talk about flavored syrups. A splash of syrup can completely transform the flavor of your mocha, adding new dimensions to the drink. Popular choices include vanilla, hazelnut, and caramel, each offering a different twist. A dash of peppermint syrup can give your mocha a festive, holiday vibe, perfect for those cozy winter days. To add a syrup, simply mix it in with the espresso and chocolate before adding the milk. You can adjust the amount to your taste, starting with about a teaspoon and increasing as needed for a stronger flavor.
If you’re looking to make your mocha even more decadent, consider adding a dollop of whipped cream on top. This isn’t just for aesthetics (although it does make your drink look café-worthy). Whipped cream adds an extra layer of creaminess that melts into the drink as you sip, making each mouthful feel luxurious. You can sprinkle some cocoa powder or cinnamon on top for a little extra flair and a subtle touch of flavor.
For those who enjoy a bit of spice in their coffee, cinnamon or nutmeg can be fantastic additions. A pinch of cinnamon stirred into the chocolate adds warmth and depth, creating a mocha with a subtle spiced edge. Nutmeg works similarly, giving the drink a cozy, autumnal feel. These spices are especially lovely during colder months, adding a comforting touch to your mocha without overpowering the other flavors.
Want to make things a little healthier? You can also tweak your mocha by swapping out ingredients. For a dairy-free version, use almond, oat, or coconut milk instead of regular milk. Each plant-based milk brings its own unique flavor—oat milk’s creamy consistency works particularly well with chocolate, while coconut milk adds a hint of tropical sweetness. If you’re watching your sugar intake, try using unsweetened cocoa powder with a sugar substitute like stevia or monk fruit.
For the adventurous, you can also experiment with different types of chocolate. Dark chocolate brings a richer, slightly bitter edge to the drink, while milk chocolate creates a sweeter, creamier mocha. If you’re feeling bold, try using white chocolate for a completely different flavor profile. White chocolate mochas are sweet and buttery, with a smoothness that complements the boldness of the espresso in a unique way.
Finally, if you’re looking for a cool treat, you can turn your mocha into an iced mocha by simply letting the espresso cool and pouring it over ice before adding the milk and chocolate. It’s the perfect way to enjoy your favorite drink during the summer months, with all the flavor but none of the heat.
No matter how you choose to customize your mocha, the possibilities are endless. With a few simple tweaks and add-ins, you can create a drink that’s perfectly tailored to your taste buds, whether you’re craving something sweet, spiced, or indulgent. Let your creativity guide you, and enjoy discovering your favorite version of this classic coffee treat!
Serving Suggestions
When it comes to serving your homemade mocha, presentation and thoughtful pairing can take the experience from satisfying to truly special. A mocha is already a rich and indulgent treat, but a few simple serving suggestions can elevate it to the next level, making it feel like a café-worthy creation right from the comfort of your own kitchen.
First off, consider the mug or glass you’ll be serving your mocha in. The right cup can make a surprising difference in the overall experience. A large, ceramic mug is a classic choice that helps keep your mocha warm for longer, allowing you to savor each sip without rushing. If you’re going for something a bit more elegant, a glass mug is a beautiful way to show off the layers of chocolate, coffee, and foam. Watching the colors swirl together adds a visual appeal that enhances the experience.
For those looking to make their mocha extra decadent, consider topping it with a generous swirl of whipped cream. This not only adds a creamy, luxurious texture but also creates the perfect base for additional garnishes. A light dusting of cocoa powder, cinnamon, or shaved chocolate adds a visual and flavorful finishing touch. These small details can make your mocha feel like it came straight from a high-end coffee shop, with minimal effort.
If you’re serving your mocha as part of a breakfast or brunch, consider pairing it with something sweet to complement its rich, chocolatey flavor. Pastries such as croissants, muffins, or cinnamon rolls are perfect companions. Their buttery, flaky textures balance out the smoothness of the mocha, creating a satisfying contrast. For a lighter option, biscuits or cookies like biscotti or shortbread provide just the right amount of crunch without overwhelming the palate.
Mocha also makes for a lovely dessert coffee, pairing beautifully with chocolate-based desserts. Think along the lines of chocolate cake, brownies, or a slice of pie. The mocha’s rich espresso and chocolate flavors harmonize with these desserts, enhancing the overall sweetness and creating a unified flavor profile. If you want to get really indulgent, serve your mocha alongside a scoop of vanilla ice cream for a makeshift affogato—an Italian dessert that combines hot espresso with cold ice cream for a delightful contrast of temperatures and textures.
Looking for something a little lighter? Serve your mocha with fruit. While chocolate and coffee might seem heavy, pairing them with fresh fruit such as berries or orange slices can create a refreshing contrast. The acidity and natural sweetness of the fruit help to cleanse the palate between sips, making the mocha feel less heavy and more balanced.
Finally, if you’re serving an iced mocha, consider adding a playful touch with a few extras. Chill your glass before serving to keep the drink cold longer, and add a straw to make it feel more like a café-style iced mocha. You can also experiment with garnishes like mint leaves or even a sprinkle of sea salt to add a surprising pop of flavor that enhances the sweetness of the chocolate and the depth of the espresso.
Whether you’re sipping your mocha on a quiet morning or serving it as the perfect ending to a meal, these simple serving suggestions can turn your drink into a delightful, memorable experience. After all, it’s not just about the taste—it’s about creating a moment of indulgence that feels truly special.
Conclusion
Making a mocha at home doesn’t have to be complicated, and with the right ingredients and a little bit of time, you can create a coffeehouse-quality drink in the comfort of your kitchen. Whether you’re a seasoned coffee lover or someone looking to try something new, the process of making a mocha is as enjoyable as the end result itself. The beauty of a homemade mocha is in its versatility—you can make it exactly the way you like, adjusting the sweetness, richness, and flavor combinations to match your mood and preferences.
From brewing the perfect espresso to carefully frothing your milk, each step is an opportunity to bring out the best in the ingredients and personalize your mocha. Adding chocolate not only enhances the richness but also creates a comforting balance between the bitterness of the coffee and the sweetness of the cocoa. The frothy milk ties everything together, making each sip creamy, smooth, and indulgent.
One of the best parts about making a mocha at home is that it allows you to get creative with variations and add-ins. Whether you prefer the simplicity of a classic mocha or want to mix things up with flavored syrups, whipped cream, or alternative milk, there’s no limit to how you can customize your drink. Don’t hesitate to experiment with different types of chocolate, spices like cinnamon or nutmeg, or even a hint of peppermint to give your mocha a unique twist. If you’re feeling adventurous, you can even try turning your hot mocha into a refreshing iced mocha for those warmer days.
By mastering the art of the homemade mocha, you not only save time and money but also gain the satisfaction of making something delicious with your own hands. Each cup becomes a small moment of indulgence, whether you’re enjoying it with breakfast, using it as an afternoon pick-me-up, or serving it to friends as a dessert drink. With the steps we’ve outlined, making a mocha can become a part of your daily routine or your go-to treat when you’re craving something sweet and rich.
In the end, the joy of making a mocha isn’t just in the final product—it’s in the process. From selecting the perfect ingredients to stirring everything together and adding your own creative touch, each step is a chance to enjoy the experience of creating something special. So, grab your espresso, your favorite chocolate, and your milk of choice, and enjoy the satisfying ritual of making your own mocha at home. You might just find that it becomes your new favorite way to enjoy coffee!